Removing the Shelves and Bins of a French Door Fridge
 Please Note: The information on this page is for Australian products only. Models, sequences, error codes or settings will vary depending on location and/or where the product had been purchased. To be redirected to your local support page please click here.
If you're looking to clean the shelves and bins of your Samsung French Door Fridge, it is important to know how to correctly remove the shelves and bins so you can get a deeper clean. Before attempting to remove, ensure that food is out of the way, or, if possible, completely removed before removing the shelves and bins.
Follow the guide below for instructions on how to correctly remove the shelves and bins of your french door fridge.
If you want to know how to remove the doors on your fridge - please consult your User Manual - as instructions vary heavily between models. The door may fall off or over and damage itself during any of these steps. To prevent an accident, use extreme caution when performing the steps to remove the door/s.
Shelf and Bin Layout

01. Fridge Shelf
02. Fridge Door Bin
03. Fridge Drawers/Crisper Drawers
04. Freezer Basket
PLEASE NOTE: The actual design of the compartments may differ from your model. To take a look at your model's design, check out your User Manual.
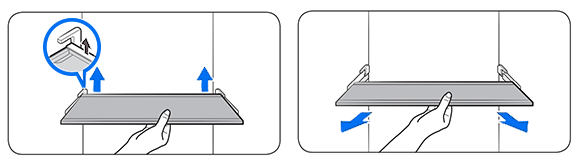
To reinsert, hold the shelf at an angle so the front is higher than the back and insert the top hook into the top shelf notch. Then, lower the shelf and insert the bottom shelf hook into the bottom shelf notch.
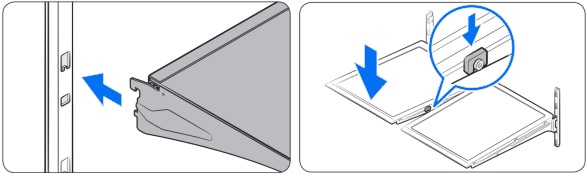
Note:
- Do not lift up the shelf completely when removing or reinserting the shelf. Doing so can damage the rear wall of the fridge.
- The tempered glass shelves are heavy. Use caution when removing them.
- Glass containers may damage the surface of glass shelves.
- The actual design of the compartments may differ from your model.
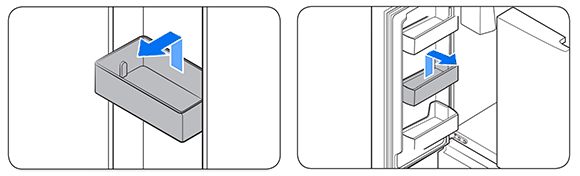
Note:
- Make sure to empty the bin beforehand. Do NOT remove a bin that is filled with food.
- Use caution when opening the door if the bottom bin contains larger bottles, as it may fall over.
- Do NOT allow children to play with the bins. Sharp corners of the bin may cause injury.

It is recommended that you remove the door bins before removing the drawer to prevent damage to the door bins.
To reinsert, insert the drawer into the frame rails and then slide inward.
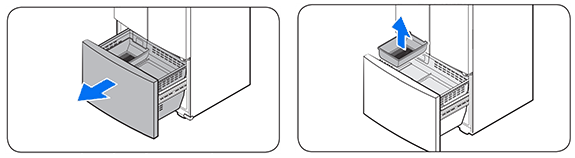
Note:
- Do not twist the basket when removing or reinserting, as the basket can be scratched.
- To prevent physical injury, property damage, or suffocation, keep children away from freezer baskets that have been removed.
- Do not remove the divider.
- Put the wheels of the upper basket on the end of the rails of the lower basket. Then, slide the upper basket all the way to the front. Otherwise, the drawer will not open or close properly, which will cause frost to build up.
- The sliding drawers of the freezer cannot be removed.
Upper Freezer Basket
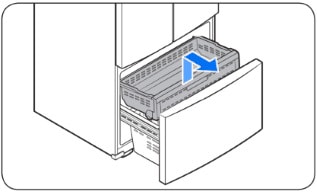
Lower Freezer Basket
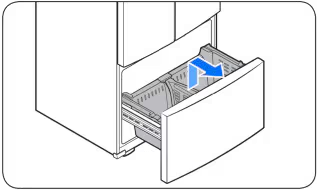

Thank you for your feedback!
Please answer all questions.
Contact Info
Contact us
WhatsApp
![]()
![]()

